The Graphly Web Tracker is a powerful tool that can help track visitors to your website. In order to track your prospects and customers from the inbox to the web, across your varying websites and landing pages, be sure to pass the contact details to all URL’s Infusionsoft redirects to.
There are various places in Infusionsoft where this can be done.
Automation Links
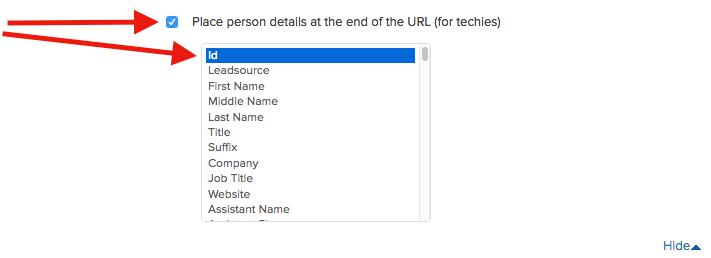
Path: Infusionsoft > Marketing > Settings > Automation Links > Edit > More Options
Tips: Check the box and then select “Id” in the list box (top of list)
Drag & Drop Builder
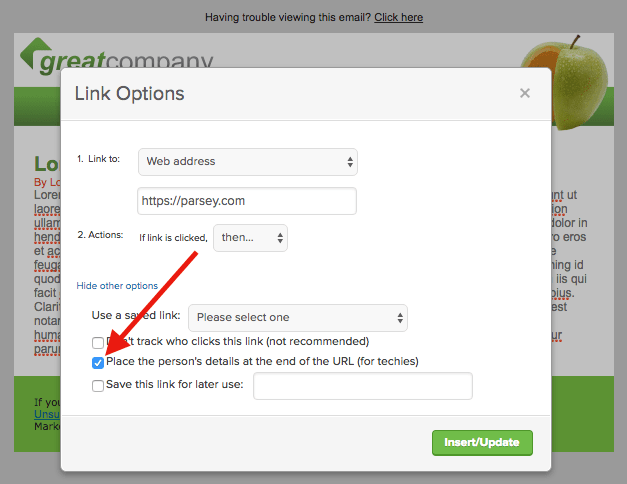
Path: Infusionsoft > Marketing > Templates > Template Name > Edit Email Body > Use Drag & Drop Email Builder > Link > Other options
Tips: After pasting your web address, check the box
Email Builder
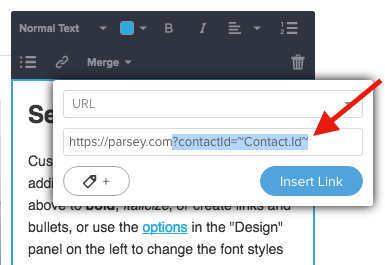
Path: Infusionsoft > Marketing > Campaign Builder > Choose Campaign > Choose Sequence > Beta Email > Link
Tips: After pasting your URL, add the following: ?contactId=~Contact.Id~ If you already have other variables appended to the query string, you’ll need to also include an & symbol like this:
&?contactId=~Contact.Id~
Classic Email Builder
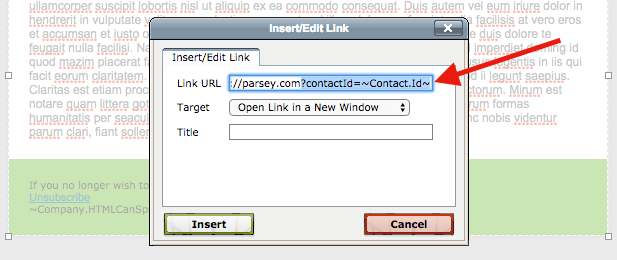
Path: Infusionsoft > Marketing > Templates > Template Name > Edit Email Body > Use Classic Email Builder > Link
Tips: After pasting your Link URL , add the following: ?contactId=~Contact.Id~ If you already have other variables appended to the query string, you’ll need to also include an & symbol like this:
&?contactId=~Contact.Id~
Code Email Builder

Path: Infusionsoft > Marketing > Templates > Template Name > Edit Email Body > Use Code Builder
Tips: If hard coding the href, add the following to the end of your URL: ?contactId=~Contact.Id~ If you already have other variables appended to the query string, you’ll need to also include an & symbol like this:
&?contactId=~Contact.Id~
Web Forms
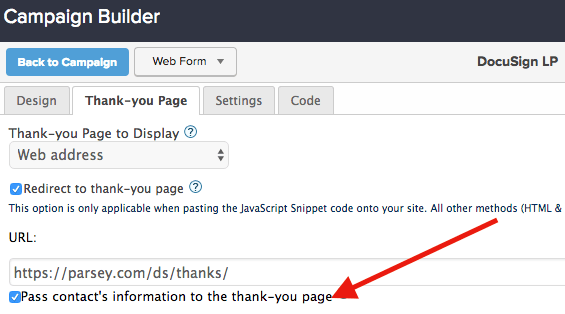
Path: Infusionsoft > Marketing > Campaign Builder > Choose Web Form > Thank-you Page
Tips: After pasting your URL, check the box
Legacy Web Forms
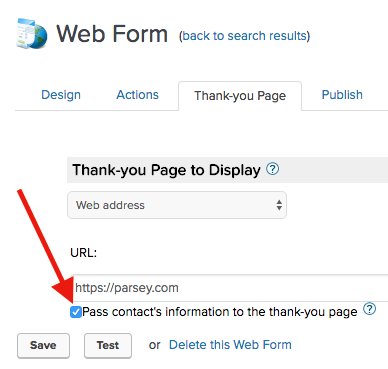
Path: Infusionsoft > Marketing > Legacy > View Web Forms > Choose Web Form > Thank-you Page
Tips: After pasting your URL, check the box
Landing Pages (Campaign Builder)
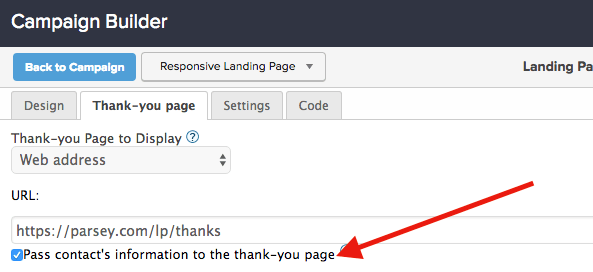
Path: Infusionsoft > Marketing > Campaign Builder > Choose Landing Page > Thank-you Page
Tips: After pasting your URL, check the box
Order Forms
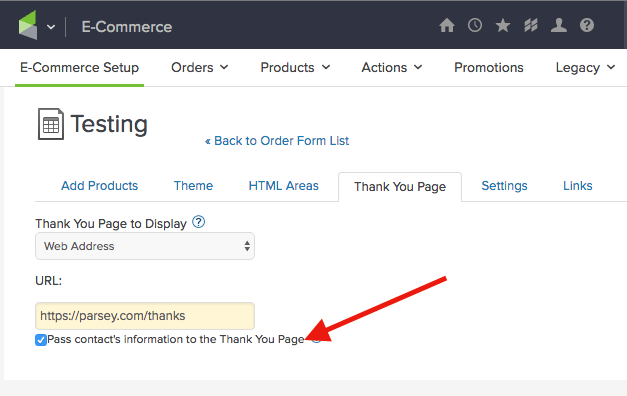
Path: Infusionsoft > E-Commerce > E-Commerce Setup > Order Forms > Choose Order Form > Thank You Page
Tips: After pasting your URL, check the box
Legacy Order Forms
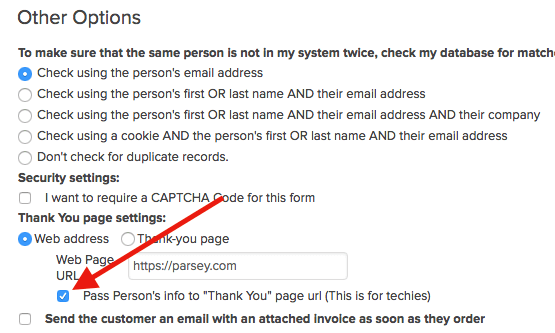
Path: Infusionsoft > E-Commerce > Legacy > Legacy Order Forms > Choose Order Form > Thank You page settings
Tips: After pasting your Web Page URL, check the box
Shopping Cart
By default the shopping cart passes the Contact Id and Order Id to the Thank You URL page. We’ve done some additional coding to work with the Finished Shopping URL even though it does not pass the required details unless an additional button is clicked. This means there are no required steps you need to take to pass the contact information to your thank you page. Visit the Web Tracker – Infusionsoft Shopping Cart article.
Product Links
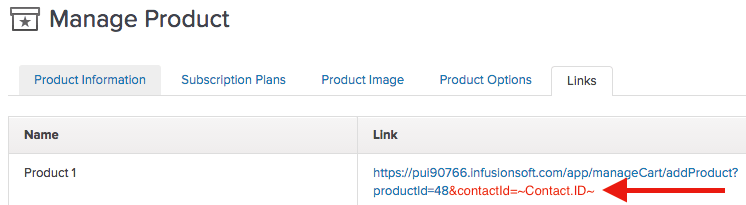
Path: Infusionsoft > E-Commerce > Products > Choose Product > Links
Tips: The only time you would choose to append the contact Id is when you’re including a product link in an Infusionsoft email template. To do so, append &contactId=~Contact.Id~ to the end of the product link. You would not append the contact Id if you were pasting this link on a static site.
Product Bundle Links

Path: Infusionsoft > E-Commerce > E-Commerce Setup > Product Bundle Links >
Tips: After building a bundle, you’d append &contactId=~Contact.Id~ to the end of the product bundle link. The only time you would choose to append the contact Id is when you’re including a product bundle link in an Infusionsoft email template. You would not append the contact Id if you were pasting this link on a static site.
Opportunity Buy Now Links
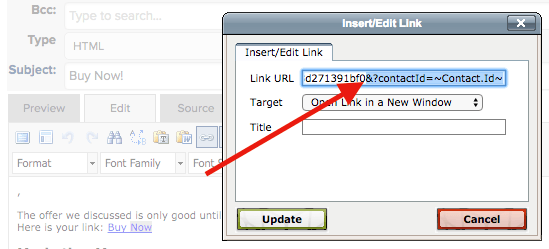
Path: Infusionsoft > CRM > Opportunities > Choose Opportunity > Select an action > Send Buy Now > Link
Tips: The Link URL will end with a serialized Id to identify the opportunity and load the cart with the correct products and subscriptions. Append &contactId=~Contact.Id~ to the end of the link. Click “Update“.
Relevant Articles
- Web Tracker and Infusionsoft Web Forms
- Web Tracker and Infusionsoft Shopping Cart
- Web Tracker and Infusionsoft Order Forms
If you don’t already have a Graphly account, you can sign up for free here to get powerful Infusionsoft reporting.