How to Configure Graphly’s Web Tracker & Landing Pages

This article will be covering the integration of Graphly’s Web Tracker with Infusionsoft’s Landing Pages.

Setting Up Graphly’s Web Tracker with Landing Pages

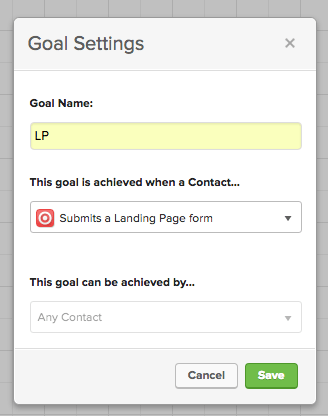
To begin, drag a goal to the canvas inside of Infusionsoft’s Campaign Builder. Name the goal and change the goal type to Submits a Landing Page form. Then click “Save“.

To begin, drag a goal to the canvas inside of Infusionsoft's Campaign Builder. Name the goal and change the goal type to Submits a Landing Pages form. Then click "Save".

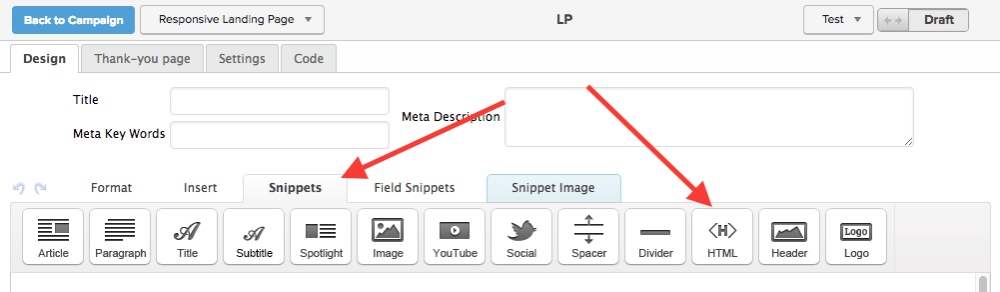
Double click on the “Landing Page” icon to edit the settings. Follow the steps you normally would by including fields, snippets, and styles of your choice. Then in the design tab click on “Snippets“. Drag the HTML Snippet to the top of the page.

Double click on the "Landing Page" icon to edit the settings. Follow the steps you normally would by including fields, snippets, and styles of your choice. Then in the design tab click on "Snippets". Drag the HTML Snippet to the top of the page gotten from Landing Pages

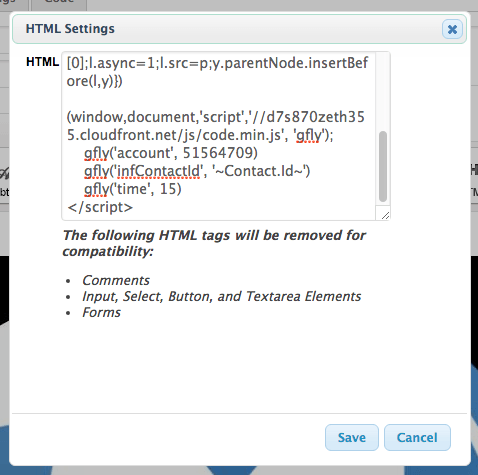
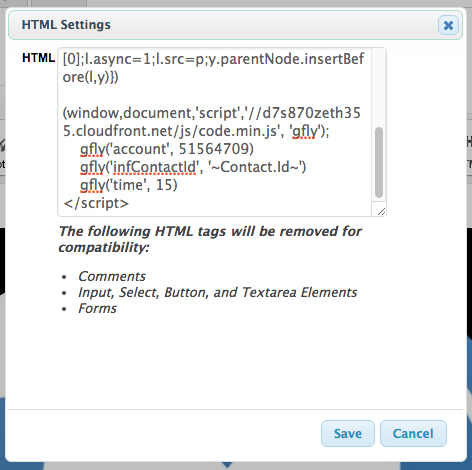
Paste the Graphly tracking code in the box and click “Save“. If you’re not sure where to find the tracking code, you can follow through the Web Tracker Setup here.

Paste the Graphly tracking code in the box and click "Save". If you're not sure where to find the tracking code, you can follow through the Web Tracker Setup here.

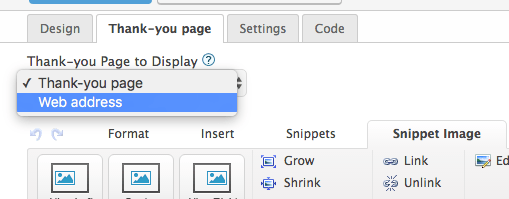
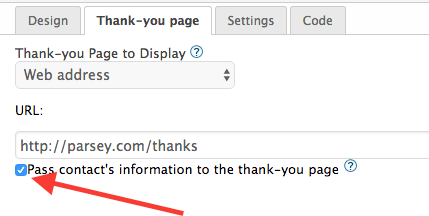
Next, click on the “Thank-you” page tab and change the dropdown menu to Web Address.

Next, click on the "Thank-you" page tab and change the dropdown menu to Web Address. For landing pages

Paste your thank-you URL in the URL box and then check the Pass contact’s information to the thank-you page box.

Paste your thank-you URL in the URL box and then check the Pass contact's information to the thank-you page box.

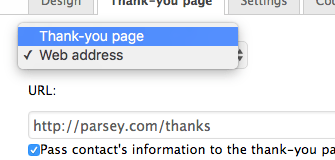
If you choose to use Infusionsoft’s thank-you page instead of your own, change the dropdown menu back to Thank-you page.

If you choose to use Infusionsoft's thank-you page instead of your own, change the dropdown menu back to Thank-you page.

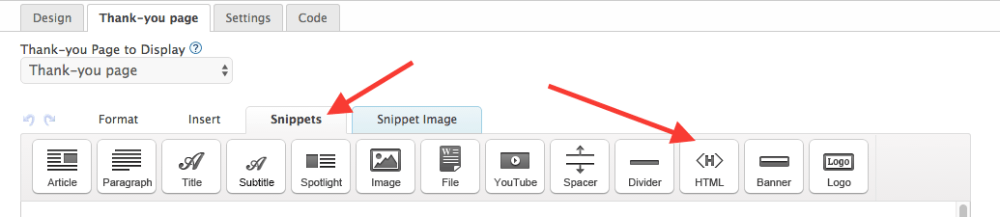
Then click on the “Snippets” tag and drag an HTML snippet to the top of the thank-you page.

Then click on the "Snippets" tag and drag an HTML snippet to the top of the thank-you page.

Finally, change the form from Draft to Ready, go back to the Campaign, and click “Publish“.

Finally, change the form from Draft to Ready, go back to the Campaign, and click "Publish".
Finally, change the form from Draft to Ready, go back to the Campaign, and click "Publish". Your integrations with Landing Pages is complete.

You should now be set to create some reports!

Relevant Articles

Was this helpful?