Here’s the truth: Keap’s reliance on tags is amazing but also a kick in the pants. Using tags to segment data as well as firing automation gives you a lot of flexibility, but it can also turn your application into a mess really fast.
How to properly use and organize your tags is a common conversation across Facebook groups, with some companies even keeping their strategies gated behind their paid services.
To help you out, we’re going to dive deep into how to create a tagging system that will keep your application clean, help you segment your contacts, and allow you to have perfect reporting.
Tags
Before we dive into how to create a tagging system, let’s first examine why (and how) you are using tags inside of your Keap* application.
**Most of our readers are using Keap, which is Keap’s more advanced marketing platform. These principles still apply to you if you are using Keap or Keap Pro.
What is a tag?
A tag is a simple way to label something. Instead of using a custom field for business type, products purchased, color of hair, or any other random piece of information, you create a tag and apply that to any contact in your application. Because Keap’s database is focused on contacts, you can only place a tag on a contact record, not opportunity records, note records, or any type of order record.
Use Tags to Segment
One of the primary reasons to use tags is to segment your data. Tags can be used to filter lists, such as saved searches, email newsletter lists, and qualified leads. There are literally hundreds of ways you can use tags to segment your list.
While tags can only be applied to contacts, you can still use those tags to filter which opportunities, orders, or subscriptions are shown. Nearly every report or search in Keap allows you to filter by the tags applied (or not applied) to the contacts associated with the search you are doing.
Use Tags to Automate
The other primary use for tags is to start and stop your marketing automation. Inside the Campaign Builder, you can use a Tag Applied Goal to start a sequence or to pull a contact out of a sequence. These are often called trigger, start/stop, or action tags because they are causing something to be automated (or for automation to be to stopped).
To help you understand how this works, let’s imagine you’ve built an upsell campaign with 4 emails promoting your offer. You can add people to this upsell campaign by applying a tag. Once they purchase your product, you probably don’t want them to receive the rest of your emails. Instead, apply another tag which will pull them out of the sequence and prevent them from getting the rest of the emails.
Another way to use tags within the campaign builder is to redirect contacts to different sequences. For example, inside of the campaign builder you can add a Decision Diamond, which is an intersection that looks for specific criteria before determining which of the following sequences the contact should enter. Tags are a common way to determine which contact should be sent to which sequence.
For example, let’s say you have two sequences, Sequence A and Sequence B. You only want contacts who watched a webinar to enter sequence A. Those that didn’t will go to sequence B, where they will be offered a replay or a different piece of content. You can apply a tag to those that watch the webinar and use that tag to determine how a contact progresses inside of your marketing campaign.
Create a tagging system
Now that you understand a little about how tags are used inside of Keap, let’s discuss creating a tagging system for your application. One of the more important parts to creating a tagging system is your discipline to follow the system and not the actual naming of tags and categories itself. If you don’t follow your system, your application will turn into a mess really quickly. Here are just a few of the headaches that messy tags can cause.
- Inaccurate reporting for your sales and marketing efforts
- Emails not being sent to the right contacts
- Your application running slow due to tag bloat
- Automations not firing the way you intend
NOTE: The tagging system below was created based on multiple other tagging systems we have learned over the years, including systems built by Three Step Marketing, Box Out Marketing, Sixth Division, and a few others. Most of these systems are similar in design and we don’t claim to be the best. However, this is what has worked for our company.
Establishing Rules
It’s important that everyone creating and implementing tags follows the same set of guidelines, or rules. The purpose of these rules will make more sense as we go through this tagging strategy.
- Every tag belongs in a category.
- Every tag follows the naming system.
- Add abbreviated category name in the name of the tag.
- The name of the tag explains its purpose.
- For applicable tag categories, add the “Remove Tag” action at the same time you add the “Apply Tag” action. This will prevent tags being forgotten and messing up automation.
Defining Tag Categories
Go into your Keap application and look at your tag categories. (CRM > CRM Settings > Tags > Tag Categories) See if you can catch a pattern of what is there.
(Go ahead and look. This article will wait for you to get back.)
Did you look? What did you find? If you are like most, you probably have categories that are for specific campaigns, some for products, some for reps or other people, and some categories that you have no idea what they are for.
We want to retrain the way you think about categories. To help keep your application clean and organized, you should only have these 6 tag categories:
- Status
- Activity
- Profile
- Trigger
- To-dos
- Temp/Test
Status Tags
Status tags are used to show a customers status in a particular campaign, your sales pipeline, email newsletter, or subscription level. The tag is meant to show where a contact is right now in your business.
These tags should rotate on and off a contact record. This is very important. If a contact enters step 1 of your marketing funnel and then progresses to the next step, you need to remove the first tag. If you don’t properly remove status tags, your reporting in Graphly (or native Keap reports) will be wrong.
Activity Tags
Activity tags show the engagement history of a contact. Some systems will call this History tags or Engagement tags, but the concept is the same. Anytime your contact takes an action that you want to record for reporting or that will redirect a contact in your automation, you need to apply an activity tag.
Because activity tags represent a history of a contacts engagement, these tags are permanent and will not be removed.
Here are some examples of contact engagement that would cause an activity tag to be applied:
- Opened Email
- Clicked Email CTA
- Registered for Webinar
- Attended Webinar
- Didn’t attend webinar
- Purchased subscription
- Canceled subscription
The examples above are generic for simplicity purposes. Actual tags should include specific names. We’ll cover tag naming later in this article.
Profile Tags
Profile tags are details about that specific contact that can be used to segment your list. Think of profile tags as demographic tags. These are details about a contact. A lot of demographic information can be stored inside of a contact field, but applying a tag can be helpful with searching and reporting.
Here are some other examples of profile tags:
- Region or Location
- Industry or Role (Auto vs Health Insurance Agent, Broker vs Agent)
- Age, Gender, or Income Range
- Software user (Wordpress, Shopify, Keap)
- Motivations or hot button
Generally speaking, these tags will not be removed because it’s not often that a contact’s demographics change. However, there are scenarios where a profile tag could change. For example, let’s say you provide agency services for professionals, such as lawyers, real estate agents, or insurance agents. If a real estate agent hires you to build a website but later switches careers to be an insurance agent, you would want to replace that profile tag to show the proper industry.
Trigger Tags
Trigger tags are used to start and stop marketing automation within your Keap application. Like status tags, it is very important that these tags are properly removed, otherwise a contact may not be able to enter that campaign again.
To-Do Tags
A to-do tag is a tag that helps a team member know that a manual task is needed for a contact record. For example, you might automatically apply a to-do tag for each new customer that needs a welcome call. Once you contact the customer, you can fill out an internal form with details about that call, which would then remove the to-do tag.
To-do tags are meant to provide sales reps, customers service reps, or any other staff member a dashboard report with contacts that need specific actions that day. Once that action is complete, an internal form or note template is used to remove it. The goal is to get to 0 to-dos by the end of the day.
Temp/Test Tags
Think of the Temp/Test category as your tag junk drawer. These are for the one-off tags that will be used one-time and then deleted. These are usually used when you are testing a campaign idea or need to run a quick report and need to apply a tag to time-stamp those contacts. For example, if I need to run a quick report to see how many new subscriptions I have this month and then cross-reference that tag against closed-won opportunities for the month I might add a tag that says “ Aug 15 2020 Subs – Delete” and add it to my Temp/Test category. Then when I know that tag is safe to delete later on.
Naming Tags
Now that we have defined your 6 tag categories, let’s talk about naming your actual tags. A good tag naming convention is one that is descriptive, easy to search, and most importantly, custom to your company. If it doesn’t make sense for your company, you will be less likely to follow it.
When you are creating a naming convention for your tags, there are a few elements you should consider adding.
- Category name. This may seem repetitive, but there are a few places inside of Keap that won’t show the category name when you are searching for tags. Adding this to the name will help find the right tag. To make things cleaner and less repetitive, we abbreviate our category tags when adding it to our tag names (STS=Status, ACT=Activity, PRF=Profile, TGR=Trigger, TD=To-do).
- Description. This is where you describe what the tag is used for. If the tag is being applied due to a specific campaign, email, or website engagement, include that in the tag description.
- Modifiers. A modifier is additional information that would be added to separate it from other similar tags. For example, we use a modifier for our activity tags associated with a webinar. Modifiers for those tags would be Viewed, Registered, Attended, No show. Tags would look like this:
- ACT:GR — Become Keap Data Wizard Webinar – Viewed
- ACT:GR — Become Keap Data Wizard Webinar – Registered
- ACT:GR — Become Keap Data Wizard Webinar – Attended
- ACT:GR — Become Keap Data Wizard Webinar – No Show
- Other information. If you notice in the example above, we have the letters “GR” in our tag name. This means Graphly. We also have other brands we run inside of the same application, including Parsey.com, Evidence.io, and MarketingMavens.com. We use a simple abbreviation (GR, PY, EV, MV) to keep tags for those brands separate. This is something custom to our business and not likely to be applicable to yours. You have the flexibility to add elements to your own naming convention like we have to our own.
The next step is to create the order in which you add each element and how you divide them up. In our business, we add the category and brand first, which are separated by a colon. Before adding the description, we add a space, two dashes, and then another space. Lastly, we seperate the description and each modifier with a space, dash, and another space.
[Category]:[Brand] — [Description] – [Modifier 1] – [Modifier 2]
We created a simple Google Sheet with to help you build and export your tags to Keap.
Free Google Sheet Tagging Tool
Get access to the exact tool we use to build all our tags for proper marketing automation and accurate reporting. PLUS see a behind-the-scenes video on how we build and apply tags to a live Keap campaign and how we built reports to show how well the campaign was doing.
Tagging Tool Opt-in
Automating Your Tags
Now that we’ve discussed creating a tagging system for your Keap applications, let’s look at a few simple use-cases and how you’d apply tags to the contacts in your campaigns.
NOTE: both of the examples below have been oversimplified for the purposes of this articles. There are countless basic and advanced scenarios to consider when implementing your tags. If you have specific questions, comment below or head over to our FB user group.
Trigger Tags
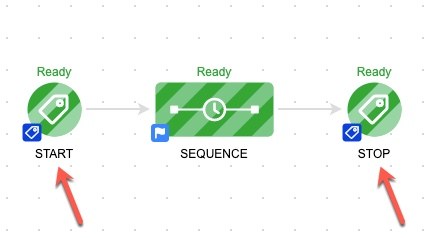
Let’s say you want to start a simple email series to promote a new product offer. You can use a tag to add people to the sequence and a tag to remove them from the sequence. If you refer back to our definitions section, the best way to do this is by using a trigger tag to start the automation and a trigger tag to stop the automation.
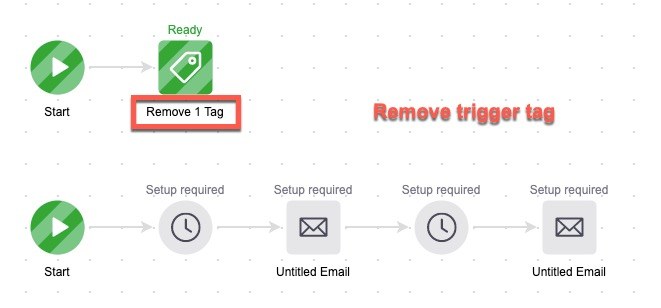
You will have a trigger tag at each end of your campaign. The start tag will add people to your sequence. If someone buys your offer (or clicks your email, if that is your goal), the tag at the end of the sequence will pull them out of your campaign.
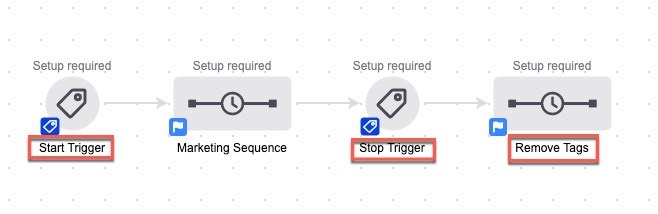
It’s important to note that we are removing the trigger tag directly after applying it. This will ensure that those tags can be applied in the future. If you don’t ever want these contacts to enter the campaign again, you can use a decision diamond that uses an activity tag (history) to filter them out.
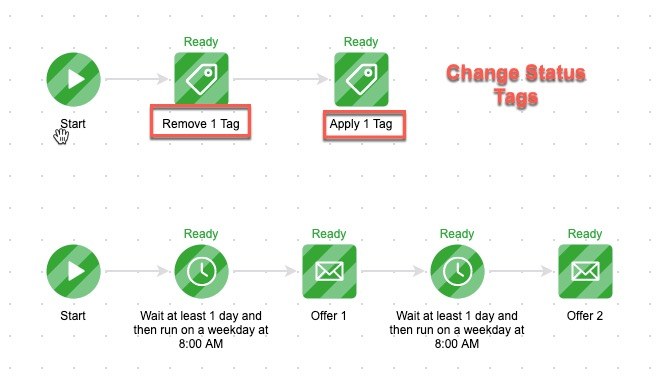
Status & Activity Tags
This next example is similar to the first, but we are now going to add a decision diamond that looks for an activity tag and then add and remove a status tag. This is a simple onboarding campaign with a few upsell opportunities.
Like in the first example, we have two trigger tags that fire when people enter and leave our email sequence. We are removing these tags at the appropriate time for our campaign.
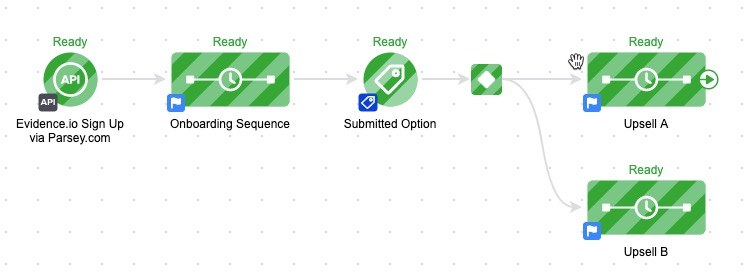
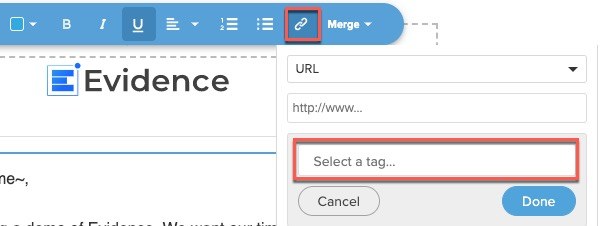
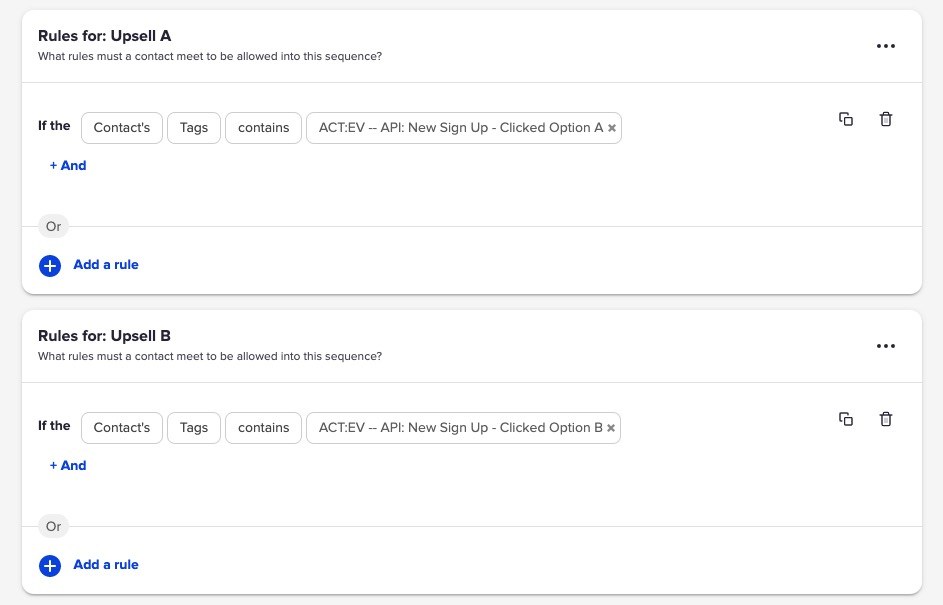
Next, when someone clicks a survey inside of the onboarding email, they are given an activity tag to show how they engaged with the email. That activity tag will be used for the decision diamond and will determine which offer they receive.
Now that the contact has entered the upsell sequence, we want to remove the prior status tag and add the new status tag. This will help us make sure we know exactly who is in which stage of our marketing funnel.